


Scheduled Payments Guide
What are scheduled payments?
Scheduled payments are payments set up in advance of the payment date and allow you to send either a one-off payment or recurring payments.
What you can do
- Set up a one-off payment: Create a single payment to be sent on a chosen future date.
- Set up recurring payments: Create a series of payments on a schedule (Weekly, Every 2 weeks, Monthly, Quarterly or Annually) until a chosen last payment date, up to a year away.
How to create a scheduled payment
Scheduling payments is straightforward and is done through the standard Send process for creating payments. You will see a Payment schedule option:
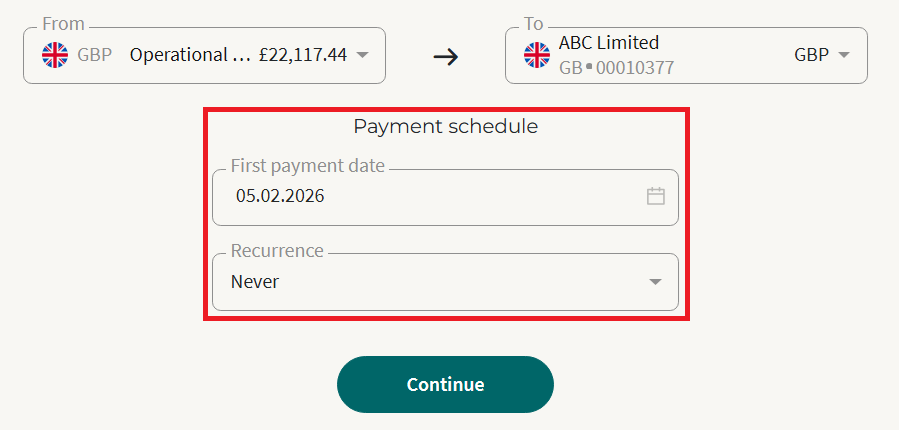
By default, no schedule will be created. If you are creating a one-off payment to go today, you do not need to make any changes to the Payment schedule.
If you would like to pay your beneficiary on a future date or on a recurring basis, choose the:
- First payment date – This is the date you wish the first payment to go to the beneficiary.
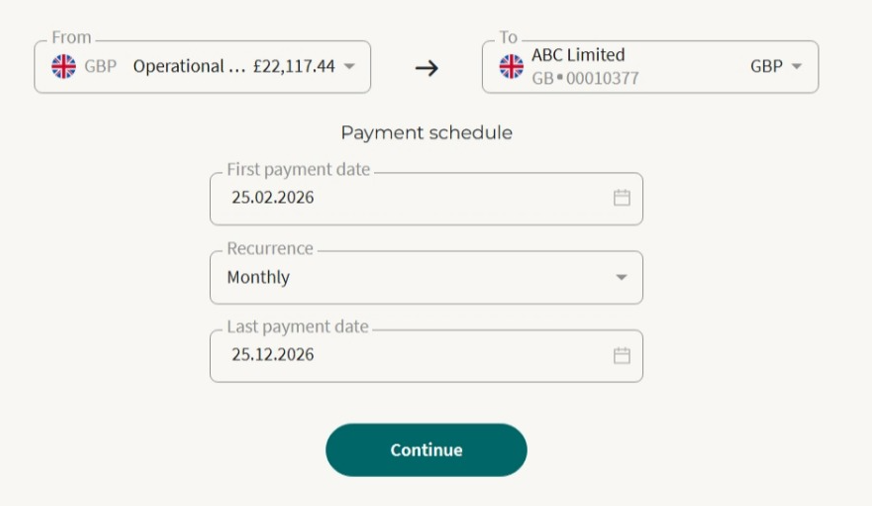
- Recurrence – This is how often you wish to pay the beneficiary. This can be Never (one-off), Weekly, Every 2 weeks, Monthly, Quarterly or Annually. If anything other than Never is selected, a Last payment date field will appear.
- Last payment date – This is the date you would like the payment schedule to end. This must be at least one full recurrence period after the First payment date (so that at least two payments are created). All payments will be scheduled up to and including the Last payment date.
If a month doesn’t have the 29th, 30th or 31st, the system uses the last valid day for monthly/quarterly payments (e.g. 31st January → 28th February → 31st March → 30th April).
Example of a monthly payment from February until December:
Managing scheduled payments
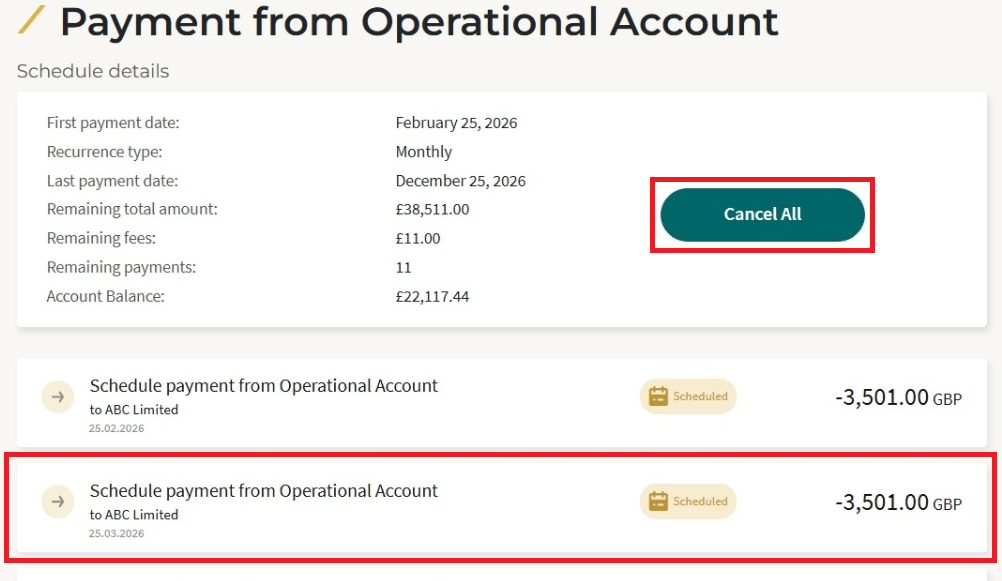
Once a schedule has been created, it will appear in the Payment Schedules section of your account. Selecting a schedule will show its current status.
To cancel an entire schedule, select the relevant schedule within Payment Schedules and choose Cancel All.
To cancel part of a schedule, open the schedule, select the specific payment you wish to cancel, and then choose Cancel Payment.
Multi-level payment authorisations
If you have multi-level payment authorisations in place, authorisers on your account will need to approve each individual payment in a schedule.
Key Points
- Please ensure that the account that a scheduled payment is going from has a sufficient balance at the time of the payment date. If the account does not have sufficient funds for 5 consecutive days, the scheduled payment will be automatically cancelled. Future payments within the same schedule will remain in place.
- If a scheduled payment requires authorising and this is not completed within 5 days after the scheduled date, the payment will be automatically cancelled. Future payments within the same schedule will remain in place.
- If a beneficiary for a scheduled payment is deleted, all remaining scheduled payments to the beneficiary will be automatically cancelled.
- If an account has more than one scheduled payment due at the same time, these will be processed in the order that they were created subject to sufficient funds being available. If there are insufficient funds for the first payment, it will be skipped and the system will process the next payment as long as the account balance is sufficient.